

 Technologies Internet et Education, © TECFA
7. Structuration: éléments de groupage et références
Voici la liste des éléments les plus importants. Notez qu’il faut se référer à la spécification pour connaître tous les attributs de ces éléments. Ici, nous ne montrons qu’un petit extrait !
<svg>
est la racine d’un graphisme SVG<?xml version="1.0" standalone="no"?>
<!DOCTYPE svg PUBLIC "-//W3C//DTD SVG 1.0//EN"
"http://www.w3.org/TR/2001/REC-SVG-20010904/DTD/svg10.dtd">
<svg>
 <rect
 x="50" y="50" rx="5" ry="5" width="200" height="100"       style="fill:#CCCCFF;stroke:#000099"/>
<text x="55" y="90" style="stroke:#000099;fill:#000099;font-size:14;"> HELLO cher visiteur </text>
<svg with="200" height="200" x="200" y="100">
    <rect
 x="50" y="50" rx="5" ry="5" width="200" height="100"
style="fill:#CCCCFF;stroke:#000099"/>
<text x="55" y="90" style="stroke:#000099;fill:#000099;font-size:14;"> HELLO cher visiteur </text>
 </svg>
</svg><gstroke="green"stroke-dasharray="9 1">
<title content="structured text">Mon plus beau dessin </title>
<line x1="5" y1="80" x2="155" y2="80" stroke-width="30" stroke="black" stroke-dasharray="none" />
<line x1="10" y1="30" x2="30" y2="100" stroke-width="5" />
<line x1="40" y1="30" x2="60" y2="100" stroke-width="10" />
<line x1="70" y1="30" x2="90" y2="100" stroke-width="15" />
<line x1="100" y1="30" x2="120" y2="100" stroke-width="20" />
<line x1="130" y1="30" x2="140" y2="100" stroke-width="25" />
</g>

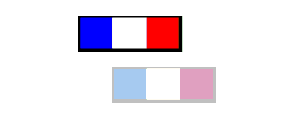
<symbol id="bleublancrouge">
<rect x="0" fill="blue" width="10" height="10"/>
<rect x="10" fill="white" width="10" height="10"/>
<rect x="20" fill="red" width="10" height="10"/>
<rect x="0" fill="none" width="30" height="10" stroke="black"/>
</symbol>
<defs>
<rect id="redsquare" fill="red" width="10" height="10"/>
<rect id="yellowsquare" fill="yellow" width="10" height="10"/>
</defs>
<rect id="redsquare" fill="red" width="10" height="10"/>
<svg width="10cm" height="3.5cm" viewBox="0 0 100 30"
     xmlns="http://www.w3.org/2000/svg"      xmlns:xlink="http://www.w3.org/1999/xlink
">
<svg width="10cm" height="3.5cm" viewBox="0 0 100 30"
xmlns="http://www.w3.org/2000/svg"
xmlns:xlink="http://www.w3.org/1999/xlink">
<rect id="MyRect" width="60" height="10"/>
<use x="20" y="10" fill="yellow" xlink:href="#MyRect" />
<use x="20" y="20" fill="red" xlink:href="#MyRect" />
</svg>

<symbol id="bleublancrouge">
<rect x="0" fill="blue" width="10" height="10"/>
<rect x="10" fill="white" width="10" height="10"/>
<rect x="20" fill="red" width="10" height="10"/>
<rect x="0" fill="none" width="30" height="10" stroke="black"/>
</symbol>
<use x="10" y="5" xlink:href="#bleublancrouge" />
<use x="20" y="20" xlink:href="#bleublancrouge" opacity="0.3" />
<defs>
<rect id="redsquare" fill="red" width="10" height="10"/>
<rect id="yellowsquare" fill="yellow" width="10" height="10"/>
</defs>
<use x="20" y="0" xlink:href="#yellowsquare" />
<use x="30" y="0" xlink:href="#redsquare" />
<use x="40" y="0" xlink:href="#yellowsquare" />
<use x="20" y="10" xlink:href="#redsquare" />
<use x="30" y="10" xlink:href="#yellowsquare" />
<use x="40" y="10" xlink:href="#redsquare" />
<use x="20" y="20" xlink:href="#yellowsquare" />
<use x="30" y="20" xlink:href="#redsquare" />
<use x="40" y="20" xlink:href="#yellowsquare" />

Les couleurs de l’Espagne sont plus gaies que celle de la France :)
<title> et <desc> permettent de documenter le code. Ces éléments ne sont pas affichés tel quels, par contre un client peut décider de les afficher comme "tooltips" par exemple
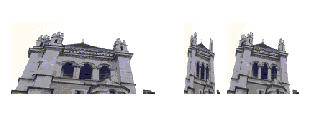
définit hauteur et largeur de l’image (comme pour <rect>, <svg>, <g>, etc.)
Des valeurs positives indiquent la taille à afficher
(Note: une valeur de 0 empêche l’affichage, les valeurs négatifs sont interdits)
définit l’URI où se trouve l’image
<image x="10" y="50" width="200" height="100" xlink:href="cathedrale_ge.jpg">
<title>Eglise large</title>
</image>
<image x="250" y="50" width="50" height="100" xlink:href="cathedrale_ge.jpg"> <title>Eglise longue</title></image>
<image x="310" y="50" width="100" height="100" xlink:href="cathedrale_ge.jpg preserveAspectRatio="xMinYMin meet">
<title>Eglise juste</title>
</image>
 -- TIE